Last updated on October 11th, 2023
Garmin Strike 4 has some of the best features you can find in any contemporary fish finder. It uses sound navigation and ranging techniques to spot fish underwater. But how does it do it? It detects the reflected pulses of sound energy. The device makes fishing life easier for anglers, increasing their chances of having a triumphant fishing moment in the waters. If you are a newbie in kayak fishing, one of the things you need to learn is how to read Garmin Striker 4.
Being one of the best fish finders you can use to locate fish, your fishing adventures might not be complete without it. This guide explains in detail how to read successfully, interpret, and understand the images and information displayed on the screen.

Interpreting The Display
Once you can understand and interpret the display, you will be better positioned to benefit significantly from your Garmin Striker 4. While this device lets you see what is below your boat, it also gives you a clear view of what is happening to your bait and how the fish is responding to it.
It will allow you to spot the exact places where fish congregate. It has a customized display that enables you to interpret the information relayed on the reflected sound. That way, this device will identify a school of fish, among other things.
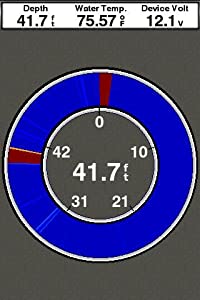
The water column on the screen of the Garmin Echo series is shown along the right edge of its display. If you want to know how deep the water is, this column will provide you with accurate information. The reading starts at zero, which is the point where the boat is standing.
The floor of the water body is shown as the level where the debris and the rock beneath appear as a solid line. What is right underneath the boat at that particular moment is shown in the right section of the screen. On the other hand, the left part of the screen displays what was below the boat a couple of minutes past.
The image displayed on the screen shows the most substantial returns in yellow, while the weak returns are blue and red on the screen. Images of rocks and other stable structures show up in yellow. Fish will give you steady returns, and you can locate them anywhere in the water. On your screen, fish will appear as arches, making it easy for you to identify them even when they are in a large school.

Customizing The Fish Finder
The Garmin Striker 4 has several buttons that help you personalize your fish finding. You can use them as your source of control so that you get improved and more fine-tuned readings, images, and details of the shown parameters. The power button is used to switch the device on or off and set the backlight brightness level. It allows you to preset the brightness levels into the following three levels and even toggle between the levels.
- Low
- Medium
- High
The Echo series has a button with which you can access all its functions. When you press the button, you are provided with numerous choices of parameters to alter. The page option allows you to choose the type of display or how the screen will be. To achieve this, you highlight the page option and then press the enter button.
The options available for you to choose from include a full screen, a split zoom screen with a zoom on one side, and a depth reader on the other, a log, a flasher, and numbers for fundamental depth values. Also, there is a split frequency that shows both the 77 and 200 kHz returns.
You can use the range option to change the depth scale to whatever value you wish. The gain option is to adjust the transducer’s sensitivity so that increasing the gain allows you to see more targets. There is a zoom option on the menu, and you can use it to bring the feature of interest closer. The depth line option is for identifying the depth at which the fish is at.


Judging Fish Size
You can decide the size of the fish from the display using the size of the arch. The bigger the arc, the bigger the fish. However, this may not be the correct way to judge the actual fish size in every situation. You are required to analyze it based on the thickness, fullness, and length of the arches.
If the Garmin Striker 4 does not show you the actual length of the fish, it can show you the arch width. Therefore, you are likely to get the actual fish size by looking at the arch’s width. It would be best if you emphasized looking at the thickness of the fish arch rather than the size. If your Garmin striker 4 shows an image of a full arch, it is probably a big fish.
Full or Half-fish Arches
The fish arches of your Garmin Striker 4 can either be full or half. Full arches appear when the fish swims to the whole sonar cone, while a half-fish arch appears when the fish only swims through part of the sonar cone. Therefore, keep in mind that half arches do not always mean small fish. It can still be a big fish worth investing your efforts in. That leaves the arch’s thickness as the most accurate way to determine the actual size of the fish.
Final Verdict
By now, you should have a clue on how to read Garmin Striker 4. Since it is one of the best fish finders on the market today, you need to understand and interpret it correctly. As a newbie in angling, this guide can enlighten you on how to use this device to make fishing more relaxed and fun for you. Many experienced anglers also need to be taught and guided on how to use these devices. If you belong to this category of people, check out this guide is designed for you. Have fun fishing with this amazing innovative device.


